Creating fillable forms are an advanced aspect of MS Word, but it’s a skill you would do well to master; especially if you routinely gather data or feedback from a target audience. So, here’s the not too difficult approach as demonstrated on MS Word 2010.
It all starts with a plan
Any design project starts with a thought and then takes the shape of a definite plan. Best thing you can do is to design it first on paper. To illustrate how to create a fill-able form in Word 2010.
The Developer Tab is the control center for forms
The Developer tab is hidden in the Ribbon. Reveal it by going to File – Options - Customize Ribbon. Under the long list of main tabs, select the checkbox for Developer.
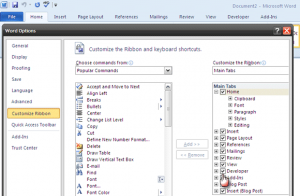
The Developer tab gets a place on the Ribbon.

Adding Content Controls
Content controls are interactive elements that help you design documents and templates quickly. Available since Word 2007, there home is on the Developer tab. Every content control has properties which can be set for user input and data collection. We start adding a few as building blocks for our form.
Type in the details that you want the recipients to fill out – like Name, Gender, Age, Country, Operating System…and a few more.
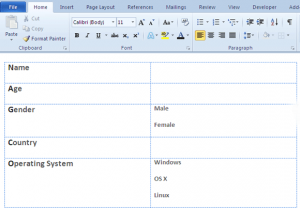
Now, the form will be embellished with a few content controls against the details we have filled out. Go to the Developer tab – insert the cursor where you want the control to appear. Under the Controls group, you can see that there are nine options to choose from depending on the user input you want. For instance, Name needs a Plain Text Control as a fill-able data field. Gender could do with check boxes for male and female. Similarly, you can insert the appropriate content controls at the right places.
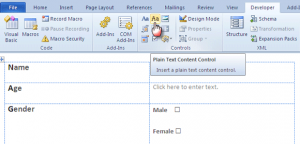
To configure the properties of the form control, click on Properties in the Controls group. The Control Content Properties dialog box will appear when called for each type of form control. Select or enter the desired properties.
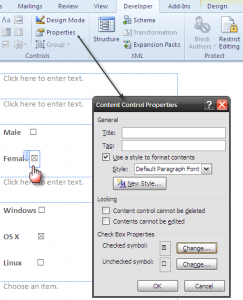
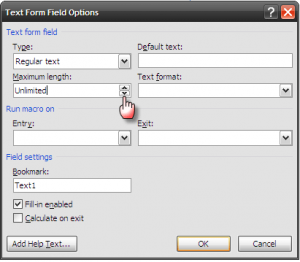
For instance, for the Text Form field for comments, you can restrict the length or keep it limited with the options in Properties.
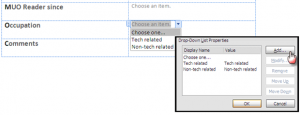
For dropdowns, you can add individual items easily from its Properties dialog.
Finalizing the form by restricting unintentional editing
Another basic feature you can enforce for form input is to control formatting and editing of form content.
Click on the form control and then select Restrict Editing from the Protect group. Options open up in a sidebar. Under Editing Restrictions select – Allow only this type of editing in the document. Select Filling in forms. Now, click on – Yes, start enforcing protection.
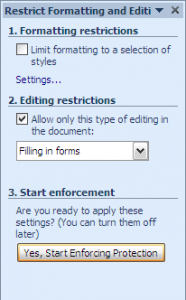
This step limits user input to the form controls only and not to the surrounding text.
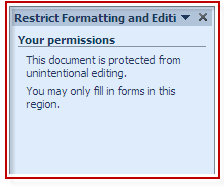
A pop-up box opens up for setting up password protection. If you do not want to password protect the document click on OK to exit the dialog. Try out the form by filling in some sample data. To get back into the design mode, stop the protection by clicking on the button and then click on Design Mode in the Control Group.
This is a form at its simplest. Formatting and designing with Word’s other tools can turn even this simple form into a powerful document for data exchange. Let us know if this tutorial has served to illustrate the primary steps to create a fillable Microsoft Word 2010 form.


